Description
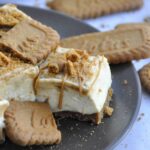
These Cheesecake bars are made with a creamy, tangy, luscious and rich cheesecake filling with Biscoff spread swirled right into it, and a crunchy, buttery Lotus Biscoff Biscuit base. The best part is, is that they’re completely no-bake – great for a hot summer’s day!
Ingredients
Scale
- 250 g Lotus Biscoff Biscuits
- 100 g butter
- 450 g cream cheese, room temperature
- 150 g powdered sugar
- 1 tsp vanilla extract / sugar
- 75 g sour cream
- 355 ml whipping cream / heavy cream
- 75 g Lotus Biscoff Spread
- Extra spread and biscuits for decorating
Instructions
Biscoff Biscuit Base
- Line a 24 x 24 cm baking pan with parchment paper. Grease with a little bit of butter.
- In a food processor, crumble together the biscuits, or place the biscuits into a Ziploc bag and use a rolling pin to crumble up the biscuits.
- Melt the butter and pour into a bowl. Add the crumbs and mix well. The mixture will resemble fine sand.
- Press down firmly into the prepared pan. Use a glass or a measuring cup to make sure it is even and to push down the edges and corners of the base.
- Put in the fridge for at least 20 minutes (or 15 minutes in the freezer).
Cheesecake Filling
- Place whipping cream in the bowl of an electric mixer. Beat on medium-high speed until it is creamy and almost stiff (it needs to hold its shape – but rather go for softer peaks).
- In another bowl, add the cream cheese and stir it until it is smooth and creamy.
- Sift in the powdered sugar and mix until combined.
- Add in the vanilla and mix well. Make sure to scrape down the sides.
- Next, add the sour cream and mix well until incorporated.
- Place the Biscoff spread into a small bowl, and then place that bowl into a bowl/Tupperware/pan filled with warm water. The Biscoff Bowl of course shouldn’t have any water get into it. This process melts the spread ever so slightly, making it easier to be fully incorporated into the filling.
- Whilst the spread is melting, fold in the whipped cream into the cream cheese mixture. Make sure it is well-combined, but don’t stir it in too vigorously, as you want to keep the lovely fluffiness.
- Add in ¾ of the melted Biscoff spread and carefully fold it in using a spatula.
- Next, spread the filling evenly on top of the biscuit base. Shake the pan ever so slightly to smooth it out a bit more.
- Lastly, pour the last of the melted spread on top, and swirl it around a bit with the back of a spoon.
- Place in the fridge for at least 2 hours (max. 10 hours, otherwise the filling cracks). The freezer works too (1 hour minimum).
- When ready to serve, lift out the whole cheesecake block and use a knife dipped in hot water to cut the bars, cleaning the knife after every cut.
- Optional: decorate each bar with a drizzle of the Biscoff spread, whole Lotus Biscoff biscuits or biscuit crumbs. Yum!
Notes
- Store any leftovers in an airtight container in the fridge (up to 2-3 days).
- The bars are best when they are firm & cold! Don’t let them stand at room temperature for too long.
- You can also use graham crackers or digestive biscuits for the base.
- You can freeze the cheesecake up to a month, but I wouldn’t have cut the block into bars yet. To defrost, put in the fridge overnight. Cut up the bars and eat immediately.
Keywords: Biscoff Cheesecake Bars, no-bake cheesecake, no-bake cheesecake recipe, cheesecake recipe, cookie cheesecake, easy cheesecake
